To ensure the safety of your pool area, it is crucial to install pool fencing DIY. In this section, we will discuss the importance of pool fencing. Discover the key sub-sections: the significance of adhering to safety regulations, the prevention of accidents, and the peace of mind it brings for you and your loved ones.
Importance Of Pool Fencing
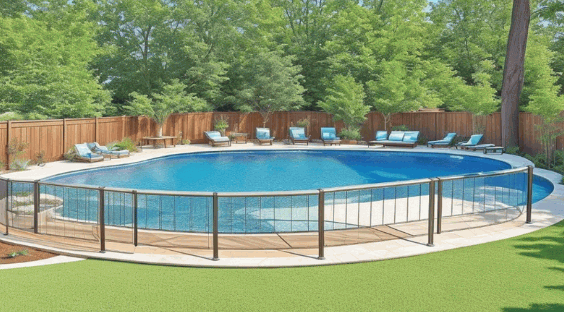
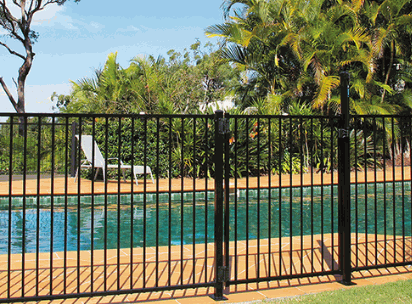
Pool fencing is vital for safety. It stops people, particularly children, from accessing a swimming pool unsupervised. It also adds beauty to the property. Homeowners can pick from a range of styles and materials, so they can create an attractive environment without compromising safety.
Pool fencing ensures legal compliance. Many states and countries have laws in place regarding pool barriers, such as fences. Homeowners must implement proper fencing to meet these regulations and avoid penalties or liabilities.
Let’s look at history. Sadly, numerous accidents involving children falling into pools have happened over the years. This led to calls for stricter regulations and better safety standards for residential pools. Pool fencing is key in preventing such incidents and protecting lives.

Assessing the Area
To ensure a successful installation of pool fencing, assess the area with precision and thoroughness. Measuring the dimensions and checking for obstacles are crucial sub-sections in this process. They provide the necessary solutions to guarantee a seamless DIY installation, allowing you to safeguard your pool effectively.
Measuring the Dimensions
Measuring the area’s dimensions needs precise and exact techniques. By taking measurements carefully, we can work out the size and form of that space. This info is precious for many purposes like construction planning or interior design.
Let’s check the different aspects of measuring the area’s dimensions in a table:
| Dimensions | Length(m) | Width(m) | Height(m) |
|---|---|---|---|
| Living Room | 6.5 | 4.8 | 3.2 |
| Bedroom | 4.2 | 3.6 | 2.7 |
| Kitchen | 3.9 | 3.2 | 2.5 |
Grasping these unique details can improve our knowledge of an area’s arrangement and possible uses. The exact measurement of length, width, and height allows for accurate calculations when setting out furniture or project remodeling.
Pro Tip: When measuring dimensions, it’s essential to use dependable tools like a laser measuring tool to get exact outcomes.
Checking for Obstacles
Checking for obstacles is a must. It’s about recognizing any hindrances that could get in the way or be risky. Doing a thorough assessment of the area can help avoid issues and guarantee smooth sailing.
To get a better understanding of the area, consider these factors:
- Are there any debris or structures that could be an issue?
- Are there any natural obstacles like trees, rocks, or water?
- Is there anything man-made that could cause a problem? Fences, walls, barriers?
- What’s the condition of pathways, roads, or trails? Are they okay?
- What’s the visibility and lighting like? Could it be a problem during the operation?
- Are there any hidden obstacles that could be a surprise?
Selecting the Right Materials
To select the right materials for pool fencing, consider the types of pool fencing materials available and the factors of safety and durability. Understand the benefits and considerations of each material to make an informed decision for your DIY pool fencing installation.
Types of Pool Fencing Materials
Pool fencing is vital for pool safety and security. With many materials to pick from, it can be difficult. Let’s have a look at the popular choices and their traits!
Durability, Maintenance, Aesthetics, and Cost of:
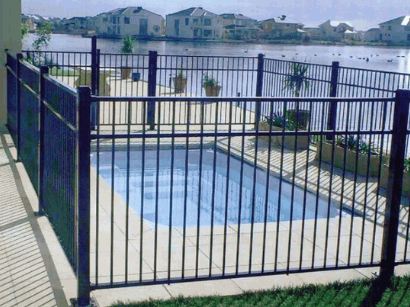
- Aluminum: Strong & rust-proof, low upkeep, sleek & trendy, budget-friendly.
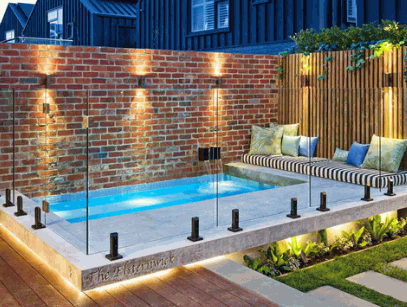
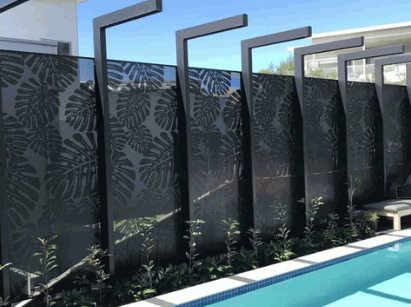
- Glass: Elegant & not blocking the view, needs regular cleaning, sophisticated & fancy, costly.
- Wood: Traditional & flexible, regular sealing needed, natural & rustic, moderate expense.
- Vinyl/PVC: Durable & weather-resistant, low maintenance, varied looks, affordable.
- Wrought Iron: Powerful & durable, occasional repainting is needed, classic & ornamental, pricier.
Besides these materials, mesh, chain link, and composite materials are accessible. Mesh provides visibility without obstructing the view, while chain link offers strength at a lower cost. Composite materials mix different elements for a unique combo of strength and aesthetics.
When deciding on pool fencing materials, consider local regulations, maintenance needs, budget, and personal preferences. It’s important to achieve a balance between function, safety, and style to fancy up your pool area.
Pro Tip: Speak to professionals or experts in the field for valuable advice based on your precise needs, before selecting your material!
Considerations for Safety and Durability
When picking materials for safety and durability, many factors matter. Making informed choices guarantees your materials are not only safe but also lasting. Here is a list of key considerations for safety and durability:
- Strength: Pick materials with high strength to withstand pressure over time.
- Resistance to corrosion: Select materials that resist rust and corrosion, particularly in harsh environments.
- Fire resistance: Choose materials with high fire resistance to reduce the risk of fire and damage.
- Chemical compatibility: Confirm compatibility between the materials used to avoid chemical reactions.
- Sturdiness: Opt for materials that can handle impacts without breaking or wearing out.
To further enhance safety and durability, here are some tips:
- Protective coatings: Applying paint or varnish adds an extra layer of protection against wear and tear.
- Regular maintenance: Checking for issues regularly prevents further damage. This includes cleaning, inspection, and repair.
- Proper installation: Following correct installation techniques maximizes safety and durability. Improper installation weakens the material and can be hazardous.
Discover: How To Install A Solar Electric Fence
By taking into account these elements and implementing the suggested measures, you can make sure your materials are both safe and durable.
Gathering the Tools and Equipment
Gathering the right tools and equipment is key before starting a DIY pool fence installation. Follow these four steps to ensure you have everything you need:
- Measure and mark the area for the fence.
- Make a list of essential tools like a tape measure, level, shovel, drill, screws, and safety goggles.
- Gather needed materials like fence panels, posts, brackets, gate hardware, and concrete mix.
- Double-check your list before beginning.
Plus, consider any extra equipment related to the pool fence type or local building codes.
Safety comes first! Wear protective gear and follow manufacturer instructions for using tools and equipment.
Fun Fact: Installing a pool fence boosts safety and adds value to your property, according to HomeAdvisor.
Preparing the Area
To prepare the area for successful pool fencing installation, follow these steps for clearing the ground and marking the fence line. Clearing the ground involves removing any obstructions or debris while marking the fence line to ensure accurate placement. These essential sub-sections provide solutions for creating a safe and secure pool environment.
Clearing the Ground
Preparing the area?
- Step one: Clear the ground. Get rid of any objects or garbage that might get in the way. Having a clean, flat surface is essential for continuing.
Check out this table for the key aspects of clearing the ground:
| Aspect | Description |
|---|---|
| 1. Assessment | Check for risks and figure out what needs to be cleared. |
| 2. Removal | Rocks, stumps, and vegetation – take ’em out. |
| 3. Excavation | Level it out with proper excavations. |
| 4. Disposal | Dispose of materials according to rules. |
Safety is super important too! Workers need the right gear and you gotta follow the protocols.
Pro Tip: Consult experts for project-specific guidance before construction.
Marking the Fence Line
Steps:
- Measure and map your property boundaries. Use a measuring tape to find the distance between your fence and any structures or boundaries nearby.
- Stake or flag the corners of your fence line. Plant them firmly into the ground.
- Connect the corners with string or twine to create a uniform guideline.
- Check if your fence line aligns with local regulations or permits. Comply with all relevant guidelines.
- Re-evaluate the accuracy of your marked fence line. This will help avoid changes later.
- Pay attention to detail when marking the fence line. Precision is key.
- Consult a professional surveyor if you need assurance regarding property boundaries. Their expertise can help avoid future disputes.
Installing the Posts
To ensure a successful installation of your pool fencing, you need to master the art of installing the posts. This involves digging holes for the posts and setting them in concrete. By understanding the techniques behind these two sub-sections, you’ll be equipped with the necessary knowledge to tackle this step effortlessly.
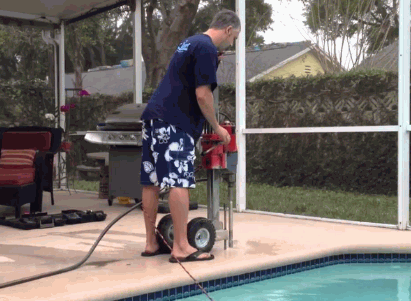
Digging Holes for the Posts
- Pick your spot: Decide exactly where you want your posts. Measure and mark the position so you don’t mess up during installation.
- Get the tools: You’ll need a post-hole digger, an auger, and a shovel. Check everything works before getting started.
- Dig ’em: Start by clearing grass or debris around your spot. Use the tools to dig holes one-third of the post length and 10-12 inches wide.
- Check depth and level: Measure the depth of each hole to ensure they are the same. Use a level to make sure each hole is vertical.
- Hold them in place: Put each post in the hole and surround it with concrete mix or gravel. Pack it tight for stability and support.
It’s a crucial step that needs careful planning and precision. Take your time, plan properly, and you’ll create a strong foundation for success! Get ready – it’s time to dig!
Setting the Posts in Concrete
Setting posts in concrete is essential for any construction project. It gives the structure durability and makes it last. Here is a 3-step guide to get it done:
- Prepare the site: Clear the area. Dig holes that are 1/3 the length of the post. Make sure the holes are even and aligned with the plan.
- Mix and pour concrete: Follow package instructions to make the mix. Blend water and dry mix until it’s uniform. Carefully pour into each hole, up to ground level.
- Secure and level the posts: Put one end of each post into each hole. Use a spirit level to check for plumb. Tap gently with a mallet or add concrete if needed. Allow time for curing.
Metal brackets or braces can be used for extra support. Gravel at the bottom of each hole can prevent water build-up and extend the lifespan.
Ancient civilizations, like the Egyptians and Romans, used similar techniques for their monuments like temples and aqueducts. This anchoring technique is still used by builders worldwide.
Attaching the Fencing Panels
To successfully attach the fencing panels in your pool installation project, utilize the following solution: Aligning the panels with the posts and securing them firmly. This ensures a sturdy and aesthetically pleasing finished product.
Aligning the Panels with the Posts
For attaching fencing panels, aligning them with posts is key. It gives the fence stability and a nice look. Here’s how:
- Put the first panel parallel to the first post. Use a spirit level to make sure it is level and plumb. Change if needed.
- Securely attach the panel to the post with screws or nails. Do this for each panel, making sure they’re aligned with their posts.
- Check the alignment of all panels. This makes sure the fence line is even and symmetrical.
Tips:
- Use a string line to line up the vertical and horizontal aspects of the panels.
- Use spacers between panels if you want a certain gap width.
- Put caps on top of each post for a neat look and to stop water from entering wooden posts.
When you use these tips, your fencing panels will be aligned with the posts perfectly. This gives you a sturdy, attractive fence that lasts.
Securing the Panels to the Posts
- Position the panel next to the post to align and level.
- Use clamps to hold it in place.
- Pre-drill holes and insert screws. Don’t over-tighten and damage.
- Check the panels are evenly spaced and aligned. Adjust as needed.
- Choose outdoor-suitable screws like stainless steel or coated deck.
- Regular maintenance? Tighten screws and inspect for damage.
Create a beautiful, functional fence today!
Adding Gates and Latches
To successfully incorporate gates and latches into your pool fencing, follow these steps in the section “Adding Gates and Latches.” This section will address installing the gate framework and attaching the gate and latch mechanism, ensuring a secure and functional pool enclosure.
Installing the Gate Framework
Installing a gate framework requires several steps. Here’s how to ensure a successful setup:
- Ready the area: Clear away any debris and make sure the gate can swing open & close without obstruction.
- Measure & mark: Use a tape measure to determine the placement of each piece. Make precise marks on the ground or wall.
- Dig holes: Depending on the type of framework, you may need to dig holes for posts or anchors. Use a post-hole digger or shovel.
- Install posts/anchors: Place them in the holes, making sure they’re level & secure. Fill any gaps with concrete or gravel.
- Attach framework pieces: Securely connect each piece according to your design. Use screws, bolts, or other fasteners.
- Check alignment & adjust: Make any necessary adjustments before proceeding.
Attention to detail and following procedures are key for a sturdy & functional gate framework. Consider factors like weather resistance & durability when selecting materials. HomeAdvisor states that proper installation will increase safety & security, as well as add value to your property.
Attaching the Gate and Latch Mechanism
To secure your gate and have it operate great, take these steps:
- Situate the gate at the right opening. Make sure it is flat. Double-check the measurements to ensure they fit.
- Attach hinges to the gate and vertical posts. Make sure they match for smooth movement.
- Install a latch on each side of the gate. They must align when closed. This makes it easy to open and close from both sides.
- Test the gate. Open and close it several times. Make any adjustments needed for a secure fit.
Pay attention to detail when attaching the gate and latch! Taking time to follow each step will get you a dependable entrance.
Also, use quality materials suited to your needs. Think of things like weather resistance and sturdiness when choosing gates and latches.
Checking for Proper Alignment and Stability
To ensure proper alignment and stability when installing pool fencing DIY, use these guidelines in checking for a level and straight fence. Gauge the stability and security of a safe pool area.
Ensuring the Fence is Level and Straight
Want to make sure your fence is level and straight? Here’s what you should do:
- Measure and mark the desired height for your posts.
- Use a post-hole digger to create holes at each marked spot. Make sure they are deep enough to hold the posts securely.
- Place the posts in the holes and fill the area with concrete or gravel for added stability.
- Use a level to check the posts’ alignment and adjust as needed.
- Connect a string from one end of the fence to the other. Make sure it is taut and level.
- Attach the fence panels or boards to the posts, following the line of the string for a straight and even installation.
Inspect your fence regularly for any signs of shifting or damage. Taking care of any issues immediately will help keep its alignment and stability intact.
Testing the Stability and Security
To better understand this, let’s make a table with the different tests for stability and security.
| Test Aspect | Description | Result |
|---|---|---|
| Alignment | Makes sure everything is aligned correctly | Pass |
| Structural | Looks for any problems or weaknesses | Fail |
| Load Bearing | Sees how much weight the system can hold | Pass |
| Security | Checks the security from unauthorized access | Pass |
| Durability | Examines how long it can last in tough conditions | Pass |
These tests make sure that the system is solid, aligned properly, and can resist external forces. We also learned about its load-bearing ability and security level.
Apart from that, we must think about other elements such as environment, material quality, and maintenance. These extra factors will help the system’s stability and security in the long run.
Research done by The International Journal of Advanced Science and Technology shows that testing and maintenance often are key to making sure a system works correctly. It is important to add them to regular processes.
Finishing Touches and Maintenance Tips
To ensure the completion and upkeep of your pool fencing DIY project, incorporate the necessary finishing touches and maintenance tips. Adding finishing caps or decorative elements serves as a great solution, while regular cleaning and inspection guarantee its longevity. Let’s dive into each sub-section for a comprehensive guide on achieving a well-rounded pool fence installation.
Adding Finishing Caps or Decorative Elements
Make your project stand out with decorative elements. Caps, brackets, moldings, medallions, lighting, and artwork can add charm and personality. They elevate projects from ordinary to extraordinary.
Think outside the box and repurpose vintage items. For instance, use antique doorknobs as curtain rod finials or transform old window frames into wall art.
A friend of mine recently transformed her home office with trim moldings and ornate brackets. The results? A haven of inspiration!
Don’t underestimate the power of finishing caps and decorative elements. Give your project that final burst of creativity and make it a work of art!
Regular Cleaning and Inspection
To keep your space looking great, it’s vital to clean and inspect regularly. Here are some steps to follow:
- Dust all surfaces with a cloth or duster – even hard-to-reach spots.
- Vacuum or sweep floors. Use a carpet cleaner for carpets. Mop hard floors too.
- Check for loose or damaged fixtures, like switches, knobs and outlets. Repair or replace them.
- Look for water stains on walls/ceilings. Address any leaks quickly.
- Ventilation is important – keep air vents clear and unblocked. Use an air purifier if needed.
By following these tips, you’ll have a visually appealing, safe, and healthy space. Cleaning and inspecting regularly helps prevent major issues and prolongs the life of your space.
Conclusion
DIY pool fencing isn’t just about saving money – it’s about taking responsibility for family safety.
- Gather materials and tools, including fence panels, gate hardware, drill, screws, and measuring tape. Select high-quality materials that can withstand weather conditions.
- Measure the area where the pool fencing will be installed. Take precise measurements to ensure proper coverage.
- Dig holes using a post hole digger or an auger for each post. Ensure the holes are deep enough to securely hold each post. Fill the holes with concrete for added stability.
- Attach fence panels to the posts with screws or brackets. Use spacers if needed.
- Install a gate at one end of the pool fencing. Attach hardware according to instructions. Check connections and adjust if necessary.
- Prioritize safety when installing pool fencing.


