
Are you tired of paying high costs for plastering services? Do you want to learn how to plaster your walls and ceilings yourself? Look no further! This article will provide step-by-step guidance on how to plaster DIY, saving you time and money while achieving professional-looking results. Let’s dive in!
What Is Plastering?
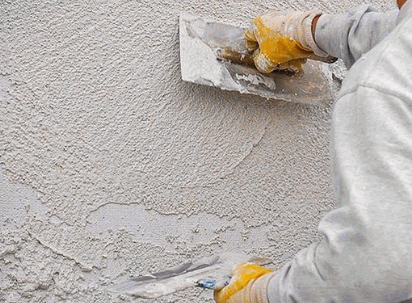
Plastering is a method used to achieve smooth and uniform surfaces on walls and ceilings. The process involves coating a surface with a layer of plaster, typically made of a mixture of cement, sand, and water, and then using a trowel to smooth it out. Plastering is beneficial for strengthening walls, concealing imperfections, and creating a polished and professional appearance.
A helpful tip for successful plastering is to ensure that the surface is thoroughly cleaned, free of dust and debris, and properly prepared before applying the plaster. This will result in better adhesion and a smoother finish.
What Are The Types Of Plastering?
When it comes to plastering, there are several methods and techniques that can be used to achieve a smooth and durable finish on walls and ceilings. Each type of plastering has its own unique characteristics and applications. In this section, we will discuss the four main types of plastering: traditional, dry lining, skim, and lime. By understanding the differences between these methods, you can choose the best option for your DIY plastering project.
1. Traditional Plastering
Traditional plastering is a technique used to create smooth and durable finishes on walls and ceilings. It involves applying multiple layers of a mixture consisting of sand, lime, and water. The process includes several steps:
- Prepare the surface by removing any loose paint or debris.
- Moisten the surface to improve adhesion.
- Mix the plaster according to the manufacturer’s instructions.
- Apply the plaster to the surface using a trowel, starting from the bottom and working upwards.
- Smooth and level the plaster using a float, ensuring an even thickness.
- Allow the plaster to dry, typically for 24 hours, before applying additional layers or finishing touches.
2. Dry Lining Plastering
Dry lining plastering, also known as drywall plastering, is a popular method used to create smooth and even walls. Here are the steps involved in dry-lining plastering:
- Prepare the area by removing any wallpaper or loose paint.
- Measure and cut the plasterboard to fit the wall.
- Apply adhesive to the back of the plasterboard and firmly press it against the wall.
- Secure the plasterboard with drywall screws, making sure to countersink them.
- Tape the joints between the plasterboard using self-adhesive scrim tape.
- Apply a thin layer of jointing compound over the tape, smoothing it with a trowel.
- Allow the compound to dry, then lightly sand it to create a smooth finish.
- Repeat the jointing and sanding process until the entire wall is smooth.
- Finish by applying a coat of primer and paint to the wall.
Dig Deeper: How To Paint Freshly Plastered Walls
3. Skim Plastering
Skim plastering is a method used to achieve a smooth and even surface on walls or ceilings. It is done by applying a thin layer of plaster over the existing surface to hide any imperfections and create a seamless finish.
The process of skim plastering typically involves the following steps:
- Preparing the surface by thoroughly cleaning it and removing any debris.
- Applying a bonding agent to promote strong adhesion between the existing surface and the plaster.
- Mixing the plaster according to the instructions provided by the manufacturer.
- Use a trowel to spread the plaster onto the surface in thin layers.
- Smoothing and leveling the plaster with a straightedge or a plastering float.
- Allow the plaster to dry before applying additional coats, if needed.
- Lightly sanding the plaster to eliminate any imperfections and achieve a smooth finish.
- Priming and painting the surface for a final polished appearance.
4. Lime Plastering
Lime plastering is a traditional method used to improve the durability and breathability of walls. It involves several steps:
- Prepare the surface by removing any loose debris and dampening it.
- Mix the lime plaster by combining lime putty and sand in the appropriate ratios.
- Apply the lime plaster to the wall using a trowel, ensuring an even thickness.
- Smooth and level the plaster by using a float or a straight edge.
- Allow the plaster to cure for several days, periodically misting it with water to promote proper hydration.
A pro tip: Before applying lime plaster, it’s crucial to prepare the surface with a primer coat or a diluted lime wash. This helps the plaster adhere better and prevents excessive absorption.
What Are The Tools Needed For Plastering?
Before diving into the process of plastering, it is important to understand the essential tools needed for a successful DIY project. Each tool plays a crucial role in achieving a smooth and professional finish. In this section, we will discuss the various tools required for plastering, including the trowel, float, plastering hawk, plastering trowel, bucket, mixing paddle, plastering brush, and sanding block. Each tool serves a specific purpose and together, they form the foundation for a successful plastering project.
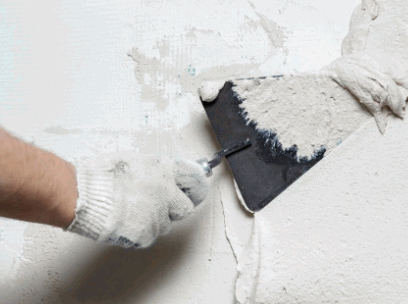
1. Trowel
A trowel is an essential tool used in plastering to properly apply and smooth the plaster mixture onto surfaces. Here are the steps to effectively use a trowel in plastering:
- Prepare the surface by cleaning it of any dust or debris.
- Moisten the surface with a mist of water to improve adhesion.
- Load the trowel with plaster and hold it at a slight angle.
- Apply the plaster onto the surface using a sweeping motion.
- Smooth and level the plaster by holding the trowel at a flatter angle and applying light pressure.
- Repeat these steps until the entire surface is covered.
- Regularly clean the trowel to prevent dried plaster from affecting future applications.
By following these steps and using a trowel effectively, you can achieve a professional and smooth finish in your plastering project.
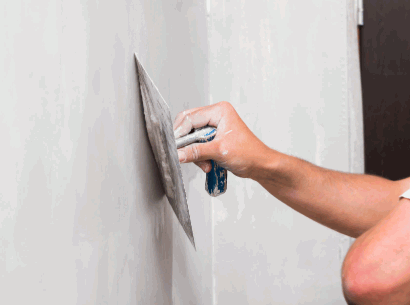
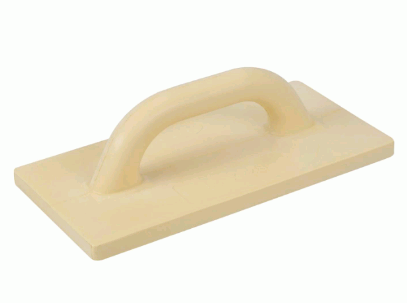
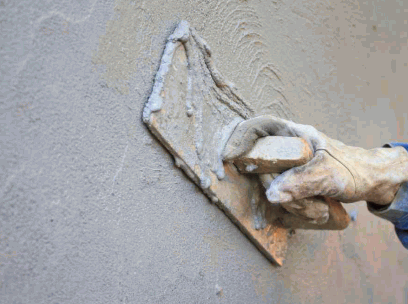
2. Float
Float is an essential tool used in plastering to achieve a smooth and level surface. Here are the steps involved in using a float:
- Prepare the surface by cleaning it and removing any loose debris.
- Apply a base coat of plaster using a trowel.
- Once the base coat is applied, use the float to spread and level the plaster across the surface.
- Hold the float at a slight angle and move it in a circular or figure-eight motion to ensure an even distribution of plaster.
- Continue using the float until the desired smoothness and levelness are achieved.
Using a float helps to create a professional finish and eliminate any imperfections in the plaster.
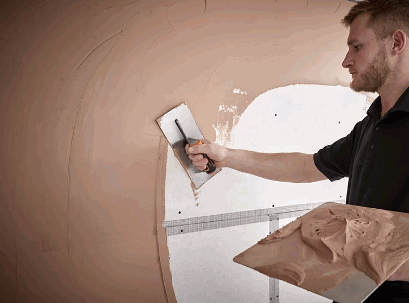
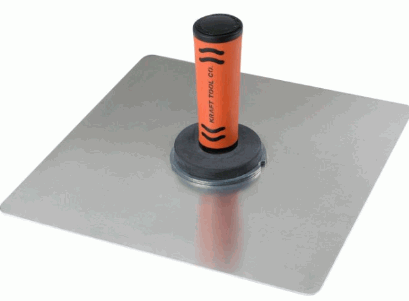
3. Plastering Hawk
A plastering hawk is a useful tool for applying plaster to walls or ceilings. Here is a step-by-step guide on how to use a plastering hawk:
- Prepare the surface by cleaning it and removing any loose materials.
- Apply a thin layer of plaster to the hawk using a trowel.
- Hold the plastering hawk firmly with one hand and use the trowel to scoop up some plaster from it.
- Using a sweeping motion, apply the plaster to the surface, starting from the bottom and working your way up.
- Continue applying plaster until the area is covered, periodically reloading the hawk with more plaster.
- Smooth and level the plaster using the trowel or a float.
Pro-tip: To prevent the plaster from drying out too quickly on the hawk, lightly mist the surface of the plaster with water before applying it.
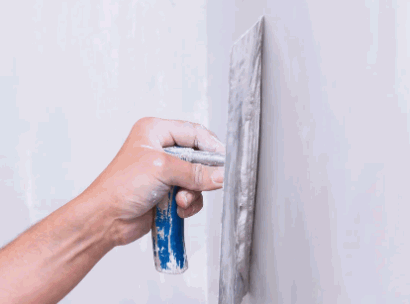
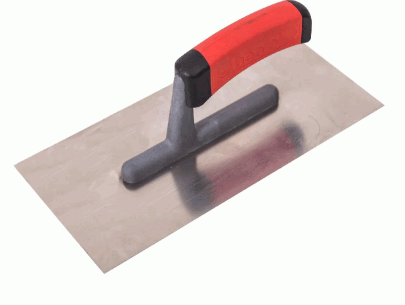
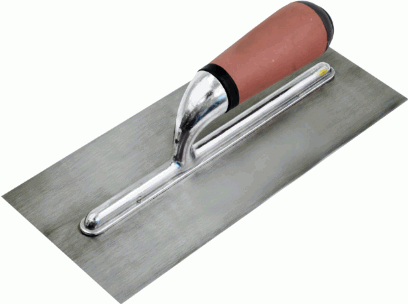
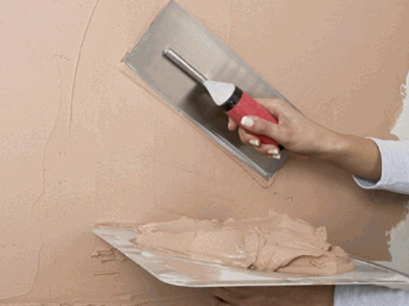
4. Plastering Trowel
A plastering trowel is a necessary tool used for the application and smoothing of plaster on surfaces. This flat, rectangular-shaped tool is typically made of metal or plastic and comes with a handle. The size and shape of the trowel can differ depending on the specific needs of the job. By using a plastering trowel, one can achieve precise application of plaster, resulting in a smooth and even finish. It is crucial to select the appropriate type of trowel for the task at hand, taking into account factors such as the size of the surface area and the type of plaster being utilized.
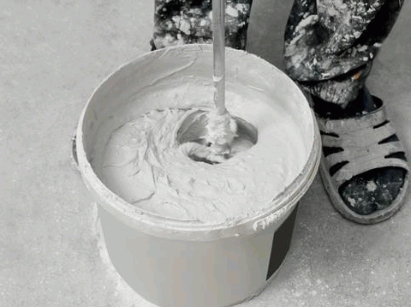
5. Bucket
A bucket is an essential tool needed for plastering projects. It serves multiple purposes and facilitates the process. Here are the steps involved when using a bucket for plastering:
- Prepare the bucket by cleaning it thoroughly.
- Measure the appropriate amount of water needed for mixing the plaster.
- Add the plaster mixture gradually to the bucket while continuously stirring.
- Use the bucket to carry the plaster mixture to the desired location for application.
- When applying the plaster, dip the trowel or float it into the bucket to retrieve the plaster.
- Keep the bucket nearby to store excess plaster or to mix additional batches as needed.
- After completing the plastering process, clean the bucket promptly to prevent the plaster from hardening.
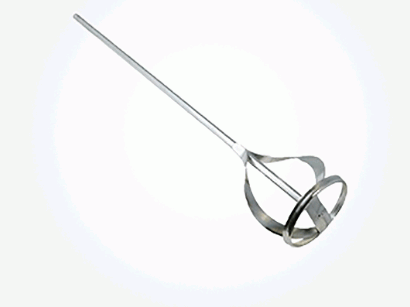
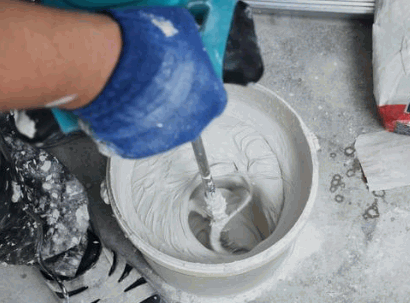
6. Mixing Paddle
A mixing paddle is a necessary tool for any plastering project. It plays a crucial role in achieving the desired consistency and smoothness of the plaster mixture.
Here are the steps for properly using a mixing paddle:
- First, attach the mixing paddle to a power drill.
- Next, measure the required amount of plaster and add it to a clean bucket.
- Add the appropriate amount of water to the bucket.
- Gently lower the mixing paddle into the bucket, making sure it is fully submerged.
- Turn on the power drill and mix the plaster and water together.
- Mix for a few minutes until the plaster is smooth and free of lumps.
- Periodically scrape down the sides of the bucket to ensure even mixing.
- Once the plaster is properly mixed, turn off the power drill and remove the mixing paddle.
- The plaster is now ready to be applied to the surface.
Using a mixing paddle guarantees a uniform and well-blended plaster, resulting in a smoother and more professional finish.
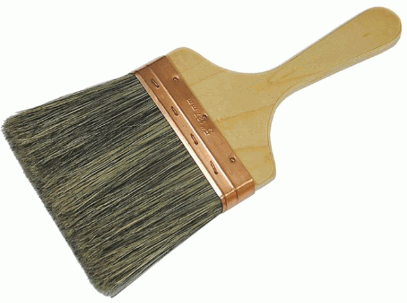
7. Plastering Brush
A plastering brush is an essential tool used in the process of applying plaster to a surface. Here are the steps for using a plastering brush:
- Clean the brush before use to ensure it is free from any debris or previous plaster.
- Dip the brush into the plaster, making sure to evenly coat the bristles.
- Begin applying the plaster to the surface, using smooth and even strokes.
- Work in small sections, applying the plaster and blending it in with the surrounding area.
- Continue applying and smoothing the plaster until the entire surface is covered.
- Use the brush to add texture or patterns, if desired.
- Clean the brush thoroughly after use to remove any dried plaster.
Fact: A plastering brush is a crucial tool for achieving a smooth and professional finish on plastered surfaces.
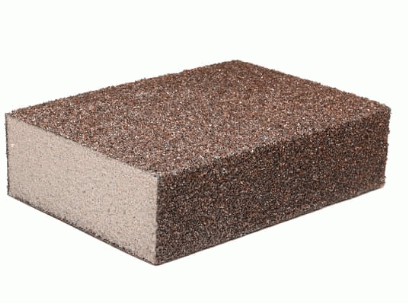
8. Sanding Block
A sanding block is an essential tool for achieving a smooth and flawless finish in plastering.
- Prepare the surface by removing any loose debris or old plaster.
- Mix the plaster according to the manufacturer’s instructions.
- Apply the plaster to the surface using a trowel or hawk and float.
- Smooth and level the plaster by using a sanding block to remove any imperfections or high spots.
- Sand and finish the plaster with a sanding block to achieve a smooth and even texture.
What Are The Steps To Plaster DIY?
Plastering may seem like a daunting task, but with the right tools and techniques, it can be a rewarding DIY project. In this section, we will break down the steps to plastering so you can confidently tackle your own home improvement projects. From preparing the surface to adding the finishing touches, we will cover each step in detail and provide tips for achieving a professional-looking result. So let’s get started and learn how to plaster DIY style!
1. Prepare The Surface
Before beginning the plastering process, it is important to properly prepare the surface. Follow these steps to ensure the surface is ready:
- Remove any loose or flaking paint or plaster from the surface.
- Thoroughly clean the surface to remove dust, dirt, and grease.
- Repair any cracks or holes in the surface using an appropriate filler.
- Apply a primer or sealer to improve adhesion and prevent moisture penetration on the surface.
- Mask off any areas that should not be plastered.
2. Mix The Plaster
When mixing plaster for DIY projects, follow these steps for optimal results:
- Measure the plaster and water according to the manufacturer’s instructions.
- Place the water in a clean bucket.
- Sprinkle the plaster into the water gradually, allowing it to sink and absorb.
- Let the mixture sit for a few minutes to allow for proper hydration.
- Use a mixing paddle or electric drill with a mixing attachment to blend the plaster and water until smooth and free of lumps.
- Check the consistency by lifting a small amount of plaster with a trowel. It should hold its shape without being too runny or too stiff.
By following these steps, you can ensure a well-mixed plaster mixture for your DIY plastering projects.
3. Apply The Plaster
Applying plaster is a crucial step in the plastering process, and it requires attention to detail and proper technique.
- Prepare the surface by cleaning it, removing any loose debris, and ensuring it is dry and free from dust.
- Prime the surface with a suitable primer to enhance adhesion.
- Mix the plaster according to the manufacturer’s instructions, using a mixing paddle and a clean bucket.
- Apply the plaster using a trowel, starting from the bottom and working your way up. Spread the plaster evenly, making sure to fill any gaps or hollows.
- Smooth and level the plaster using a float, ensuring a flat and even finish.
- Allow the plaster to dry and cure completely before applying any further coats or finishes.
Historically, plastering has been used for centuries, dating back to ancient civilizations such as Egypt, Greece, and Rome. These civilizations used plaster to create decorative finishes on walls and ceilings, showcasing their artistic and architectural skills. The process of applying the plaster, also known as “applying the plaster,” was essential in achieving these intricate and beautiful designs.
4. Smooth And Level The Plaster
To achieve a smooth and level finish when plastering, follow these steps:
- Ensure the plaster is at the right consistency, neither too wet nor too dry.
- Start at one corner of the wall and use a trowel to apply the plaster evenly.
- Spread the plaster in thin layers, building it up gradually to avoid unevenness.
- Use a straight edge, such as a float or a plastering rule, to smooth and level the plaster across the wall.
- Smooth the surface with a plastering trowel, using long, sweeping motions to eliminate any imperfections.
- Check for any low spots or bumps and correct them by adding or removing plaster as needed.
- Allow the plaster to be partially set before using a damp sponge or sanding block to further smooth the surface.
- Repeat the process until the plaster is completely smooth and level.
5. Sand And Finish The Plaster
To properly sand and finish the plaster, follow these steps:
- Clean the surface: Remove any dust or debris from the plaster using a brush or vacuum.
- Prepare sandpaper: Choose a fine-grit sandpaper, such as 120 or 150 grit.
- Sand the plaster: Gently sand the entire surface of the plaster, using circular motions to create an even finish. Be careful not to apply too much pressure.
- Smooth the edges: Pay special attention to the edges or corners of the plaster, ensuring they are smooth and seamlessly blended.
- Wipe away dust: Use a clean cloth to wipe away any residual dust or particles from the sanded plaster.
- Inspect and touch-up: Assess the surface for any imperfections or rough spots. If necessary, apply an additional layer of plaster and repeat the sanding process.
- Apply a finishing coat: Once the surface is smooth and even, apply a final coat of plaster or a sealant to protect the finish.
What Are The Common Mistakes To Avoid When Plastering DIY?
Plastering may seem like a simple DIY task, but it’s important to avoid making common mistakes that can result in an uneven and unsightly finish. In this section, we will discuss the most common mistakes to avoid when plastering. From preparing the surface properly to finishing the plaster, we’ll cover everything you need to know to achieve a smooth and professional-looking result. So let’s dive in and learn how to avoid these pitfalls and achieve a flawless plastering job.
1. Not Preparing The Surface Properly
Properly preparing the surface is crucial for successful plastering DIY projects. Here are the steps to ensure a well-prepared surface:
- Clean the surface: Remove any debris, dust, or loose material using a brush or vacuum.
- Repair any damages: Fill in cracks, holes, or uneven areas with a suitable filler or patching compound.
- Smooth the surface: Use sandpaper or a sanding block to even out any rough or uneven spots.
- Prime the surface: Apply a primer to create a smooth and adhesive surface for the plaster to adhere to.
- Protect surrounding areas: Cover floors, furniture, or fixtures with drop cloths or plastic sheets to prevent damage from plaster splatters.
Remember, proper surface preparation is essential to avoid any issues with your plastering project. Take your time and ensure each step is done meticulously for the best results.
2. Not Mixing The Plaster Correctly
When it comes to plastering, it is crucial to mix the plaster correctly in order to achieve a smooth and consistent texture. Follow these steps to ensure proper mixing:
- Measure the correct ratio of plaster to water according to the manufacturer’s instructions.
- Pour a portion of the water into a clean bucket.
- Add the plaster gradually while continuously stirring with a mixing paddle.
- Continue mixing until the plaster is fully blended and free of lumps.
- Allow the mixture to sit for a few minutes to allow the plaster to hydrate.
- Give the plaster a final stir before applying it to the surface.
Pro-tip: To avoid any inconsistencies, always use the specified amount of water and ensure thorough mixing to achieve the desired results.
3. Applying Too Much Plaster At Once
Applying a large amount of plaster at once can result in a poor finish and make it difficult to work with. To avoid this mistake, follow these steps:
- Prepare the surface by cleaning and removing any loose debris.
- Wet the surface with water to improve adhesion.
- Mix the plaster according to the manufacturer’s instructions.
- Apply a thin coat of plaster using a trowel, working in small sections.
- Smooth and level the plaster with a float or trowel.
Remember, it’s better to apply multiple thin coats of plaster rather than one thick coat. This allows for better control and a smoother finish.
Fact: Applying too much plaster at once can cause cracking and shrinking as it dries, leading to a compromised plaster job.
4. Not Smoothing And Leveling The Plaster
Smoothing and leveling the plaster is an essential step in achieving a professional finish. Follow these steps to ensure a smooth and level surface:
- Using a plastering trowel, apply a second coat of plaster to the wall.
- Hold the trowel at a slight angle and apply pressure to smooth the surface.
- Work in small sections, starting from the top and moving downwards.
- Use a straight edge, such as a spirit level, to check for any uneven areas.
- If there are any bumps or lumps, gently scrape them off with the trowel.
- Once the entire surface is smooth, use a sanding block to lightly sand the plaster.
- This will remove any imperfections and create a seamless finish.
- Finish off by wiping the surface with a damp cloth to remove any dust.
5. Not Sanding And Finishing The Plaster Properly
Properly sanding and finishing the plaster is crucial to achieve a smooth and polished final surface. Follow these essential steps to ensure the best results:
- Allow the plaster to dry completely before beginning the sanding process.
- Gently sand the surface in circular motions using a sanding block or sandpaper.
- Remove any dust or debris from the surface with a clean cloth or brush.
- If needed, apply a second coat of plaster and smooth it with a trowel.
- Repeat the sanding process to ensure a seamless finish.
- Wipe away any remaining dust and apply a primer or sealant before painting or wallpapering.


