
If you’re considering renovating your home, one element you may be curious about is lime plastering. This traditional building technique has been used for centuries and is still relevant today. In this article, you’ll discover the benefits of lime plastering and why it may be the perfect solution for your renovation project.
What Is Lime Plastering?
Lime plastering is a traditional method of wall finishing that utilizes lime as opposed to cement or gypsum. This technique has numerous advantages, such as breathability, flexibility, and durability. Lime plastering is also resistant to water, making it suitable for both indoor and outdoor applications. Its antimicrobial properties further enhance its appeal by preventing the growth of mold and mildew.
In addition to its practical benefits, lime plastering also offers a unique aesthetic with its soft, matte finish. It is commonly utilized in historic preservation projects and eco-friendly construction. If you are considering lime plastering for your home, it is recommended to consult a professional contractor for expert advice and guidance.
What Is the Difference Between Lime Plastering and Cement Plastering?
Lime plastering and cement plastering have distinct differences in their composition, application, and properties. Lime plastering utilizes a mixture of lime, sand, and water, providing benefits such as breathability, flexibility, and aesthetic appeal. This makes it a suitable choice for historic buildings and areas with high levels of moisture.
On the other hand, cement plastering consists of cement, sand, and water, offering strength and durability. It is commonly used in modern construction projects. However, unlike lime plaster, cement plaster is less breathable and more susceptible to cracking.
A helpful tip is to consider using lime plaster for older structures or renovation projects in order to preserve their authenticity and heritage value.
Explore: How To Plaster DIY
What Are the Benefits of Lime Plastering?
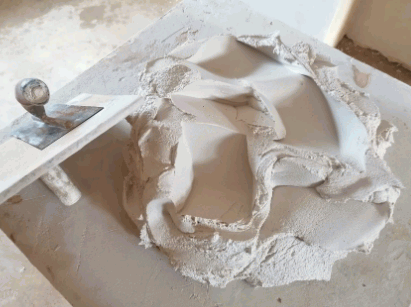
Lime plastering, also known as lime rendering, is a traditional building technique that has been used for centuries. This method involves coating walls with a mixture of lime, sand, and water to create a smooth and durable finish. But what makes lime plastering stand out from other types of plastering? In this section, we will explore the various benefits of lime plastering, including its breathability, flexibility, durability, and aesthetic appeal. By understanding these advantages, you can determine if lime plastering is the right choice for your next building project.
1. Breathability
Breathability is a key benefit of lime plastering, as it allows moisture to evaporate and prevents moisture-related issues.
- Prepare the surface by removing dust, debris, and loose materials.
- Mix the lime plaster by combining lime putty or hydraulic lime with aggregates and water.
- Apply the first coat, known as the scratch coat, to create a base for the plaster.
- Apply the second coat, called the skim coat, to achieve a smooth and even finish.
- Finish and polish the plaster, ensuring a visually appealing and durable surface.
Fun Fact: Lime plastering has been used for centuries and can still be found in historic buildings around the world.
2. Flexibility
Lime plastering offers flexibility as one of its key benefits. This flexibility allows for better performance in various situations and applications. Here are the steps involved in the application of lime plaster:
- Preparing the surface: Clean and prepare the surface by removing any loose materials or debris.
- Mixing the lime plaster: Mix the lime plaster according to the manufacturer’s instructions, ensuring a smooth and consistent texture.
- Applying the first coat: Apply the first coat of lime plaster evenly on the surface, using a trowel or plastering tool.
- Applying the second coat: Once the first coat is dry, apply a second coat of lime plaster to achieve the desired thickness and smoothness.
- Finishing and polishing: After the second coat has dried, use a sponge or float to smooth and polish the surface, creating a visually appealing finish.
The flexibility of lime plaster allows it to adapt to different surfaces and movements, making it an ideal choice for historic buildings, curved walls, or areas prone to cracking.
3. Durability
Lime plastering is a highly durable option that is widely used for various applications. Its ability to stand the test of time can be attributed to several factors:
- 1. Breathability: Lime plaster allows walls to breathe, preventing moisture buildup and reducing the risk of cracks and decay.
- 2. Flexibility: Lime plaster is more flexible than cement plaster, allowing it to accommodate minor movements in the structure without cracking.
- 3. Longevity: Lime plaster has a long lifespan and can withstand harsh weather conditions without deteriorating.
- 4. Aesthetic Appeal: Lime plaster provides a beautiful, textured finish that enhances the visual appeal of any space.
Pro-tip: To further enhance the durability of lime plaster, it is important to properly prepare the surface and use high-quality lime products. Regular maintenance, such as cleaning and patching, can also help extend its lifespan.
4. Aesthetic Appeal
Lime plastering offers several benefits, including its aesthetic appeal. Here are some reasons why lime plastering is preferred for its visual appeal:
- Smooth and elegant finish: Lime plaster provides a beautiful, velvety-smooth finish that adds a touch of sophistication to any space.
- Wide range of finishes: Lime plaster can be customized to achieve various textures and finishes, such as polished, rough, or textured, allowing for unique and artistic designs.
- Natural and organic look: Lime plaster’s natural ingredients give it a unique, earthy appearance that blends seamlessly with traditional and historic architecture.
- Enhances natural light: Lime plaster has a reflective quality that helps amplify natural light, creating a bright and airy atmosphere.
- Color versatility: Lime plaster can be pigmented with natural pigments, offering a wide range of color options to suit different design preferences.
With its aesthetic appeal, lime plastering is not just functional but also visually pleasing, making it an excellent choice for both interior and exterior surfaces.
What Are the Different Types of Lime Plastering?
Lime plastering is a traditional building technique that has been used for centuries. It involves the application of lime-based mixtures onto walls and ceilings, creating a durable and breathable surface. However, not all lime plasters are created equal. In this section, we will discuss the different types of lime plastering available, including hydraulic lime plaster, non-hydraulic lime plaster, and lime putty plaster. Each type has its own unique properties and uses, making it important to understand the differences between them.
1. Hydraulic Lime Plaster
Hydraulic lime plaster is a type of lime plaster that offers unique benefits and is commonly used in construction and restoration projects. Here are the steps involved in applying this specialized plaster:
- Prepare the surface by removing any loose material and ensuring it is clean and damp.
- Mix the hydraulic lime plaster with water according to the manufacturer’s instructions, ensuring a smooth consistency.
- Apply the first coat of hydraulic lime plaster to the surface using a trowel or a plastering tool.
- Allow the first coat to dry before applying the second coat, ensuring a uniform thickness.
- Finish and polish the hydraulic lime plaster by using a sponge or a float to achieve the desired texture and smoothness.
By following these steps, you can achieve a durable and aesthetically pleasing finish with hydraulic lime plaster.
2. Non-Hydraulic Lime Plaster
Non-hydraulic lime plaster is a type of lime plastering that does not contain any hydraulic binders. It is often utilized for historic preservation and restoration projects.
The process of applying non-hydraulic lime plaster involves several steps:
- Preparing the surface: Make sure that the surface is clean, free from dust, and dampened.
- Mixing the lime plaster: Combine non-hydraulic lime, sand, and water in the appropriate proportions to create a workable plaster mix.
- Applying the first coat: Use a trowel to apply a thin layer of lime plaster onto the surface.
- Applying the second coat: Once the first coat has partially dried, add a second layer of lime plaster to achieve the desired thickness.
- Finishing and polishing: Smooth and level the surface of the lime plaster using a float or trowel.
Non-hydraulic lime plaster is known for its breathability, flexibility, and compatibility with historic building materials. It is commonly used for interior and exterior walls, fireplaces, chimneys, and decorative elements. To maintain lime-plastered surfaces, regular inspections and repairs are necessary to prevent cracks and damage.
3. Lime Putty Plaster
Lime putty plaster is a type of lime plastering that utilizes lime putty, which is created by slaking quicklime with water. This traditional method of plastering has been used for centuries and offers several advantages. Here are the steps involved in applying lime putty plaster:
- Prepare the surface by cleaning it and removing any loose materials.
- Mix the lime putty with sand in the desired ratio to create a workable plaster mix.
- Apply the first coat of plaster, known as the scratch coat, using a trowel or hawk and float.
- Allow the scratch coat to partially dry before applying the second coat, known as the float coat.
- Finish and polish the plaster using a wooden float or trowel to achieve the desired texture and smoothness.
Fun fact: Lime putty plaster has excellent breathability, allowing moisture to pass through the walls, which helps prevent dampness and promotes a healthier indoor environment.
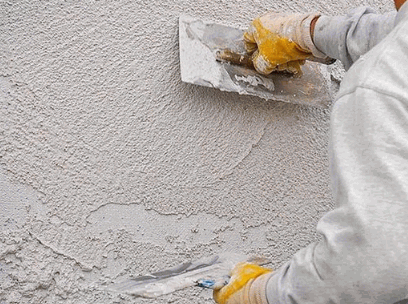
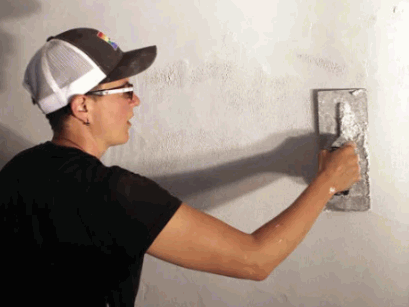
How Is Lime Plastering Applied?
In the world of architectural finishes, lime plastering is a traditional and versatile material that has stood the test of time. But how exactly is lime plastering applied? In this section, we will break down the step-by-step process of applying lime plaster. From preparing the surface to finishing and polishing, each stage is crucial in achieving a smooth and durable final result. So let’s dive into the world of lime plastering and uncover the techniques behind this ancient building material.
1. Preparing the Surface
Preparing the surface is a crucial step in lime plastering, ensuring proper adhesion and a smooth finish. Follow these steps for surface preparation:
- Clean the surface: Remove any dirt, dust, or loose particles from the wall using a stiff brush or vacuum cleaner.
- Repair any damage: Patch up cracks, holes, or uneven areas with a suitable filler or lime mortar.
- Moisten the surface: Dampen the wall with water before applying the plaster. This helps prevent rapid drying and improves bond strength.
- Prime the surface: Apply a coat of lime wash or primer to seal the surface and enhance adhesion.
- Create a key: Scratch or score the surface with a tool to provide a textured surface that allows the plaster to grip better.
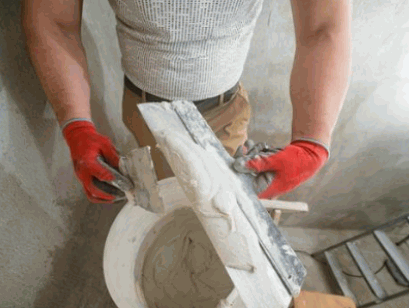
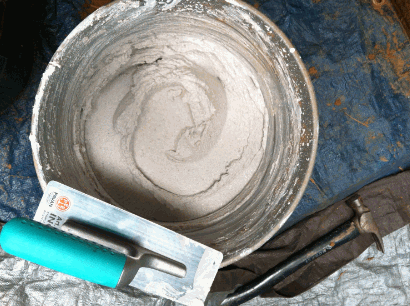
2. Mixing the Lime Plaster
Mixing lime plaster requires careful attention to proportions and consistency to ensure a quality finish. Here are the steps involved:
- Gather the materials: lime putty, sand, and water.
- Measure the ingredients: Use a ratio of 1 part lime putty to 3 parts sand.
- Combine the lime putty and sand in a mixing container.
- Add water gradually while continuously mixing.
- Mix until the plaster reaches a creamy consistency with no lumps.
- Allow the mixture to rest for a short period to hydrate.
- Re-mix the plaster to ensure homogeneity.
Properly mixed lime plaster provides excellent workability and adhesion, making it suitable for various applications in construction and restoration projects.
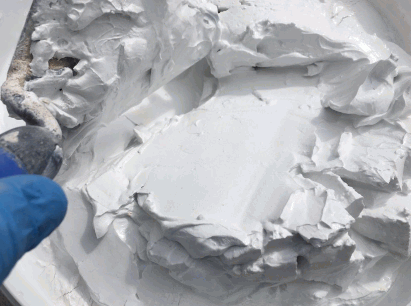
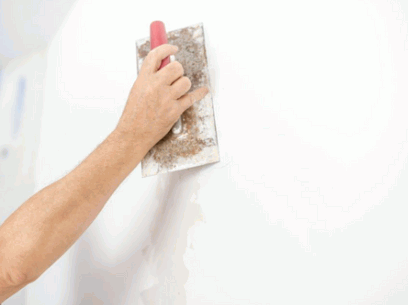
3. Applying the First Coat
Applying the first coat of lime plaster is a crucial step in the process. Here are the steps involved in applying the first coat:
- Prepare the surface by cleaning it thoroughly and removing any loose debris or old plaster.
- Mix the lime plaster according to the manufacturer’s instructions, ensuring a smooth and creamy consistency.
- Apply the first coat of lime plaster evenly and smoothly using a trowel. Start from the bottom and work your way up, covering the entire surface.
- Use a scratch coat technique, where you create horizontal lines on the plaster with a scratching tool. This helps the second coat adhere better.
- Allow the first coat to dry completely before applying the second coat. This can take several days, depending on the humidity and temperature.
Remember to wear protective gear and follow safety guidelines during the application process. It’s always a good idea to consult with a professional or refer to detailed instructions for specific products.
Applying the first coat of lime plaster requires precision and attention to detail. Following these steps will ensure a strong foundation for the subsequent layers, resulting in a beautifully finished lime plaster surface.
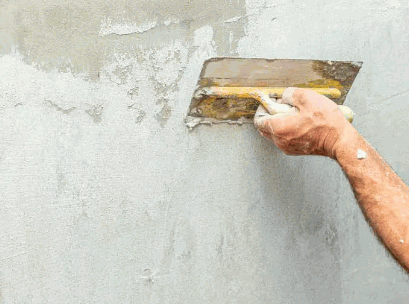
4. Applying the Second Coat
To apply the second coat of lime plaster, follow these steps:
- Prepare the surface by ensuring it is clean, free from debris, and dampened.
- Mix the lime plaster according to the manufacturer’s instructions, ensuring a smooth and consistent texture.
- Using a trowel, evenly apply the second coat of lime plaster over the first coat, starting from the bottom and working upwards.
- Level and smooth the second coat using a straight edge or plastering float, ensuring a uniform thickness.
- Allow the second coat to dry completely before adding any finishing touches or additional coats.
Fun Fact: The second coat of lime plaster is crucial for achieving the desired thickness and strength of the plastered surface.
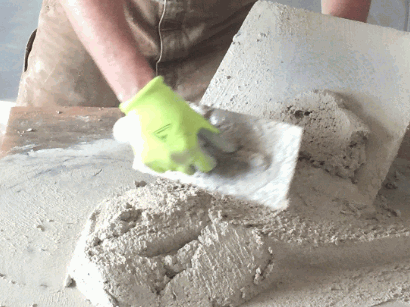
5. Finishing and Polishing
To achieve a smooth and polished finish with lime plastering, follow these steps:
- Prepare the surface by removing debris and ensuring it is clean and dry.
- Mix the lime plaster according to the manufacturer’s instructions.
- Apply the first coat of lime plaster evenly, using a trowel or a plastering float.
- Allow the first coat to partially dry before applying the second coat.
- Apply the second coat, ensuring it is smooth and level.
- Once the plaster has fully dried, use a damp sponge to gently polish the surface, removing any imperfections.
- Repeat the finishing and polishing process as needed until the desired finish is achieved.
Finishing and polishing the lime plaster not only enhances its appearance but also helps to create a durable and long-lasting finish for your walls or decorative elements.
What Are the Common Uses of Lime Plastering?
Lime plastering is a traditional building technique that has been used for centuries. It involves mixing lime, sand, and water to create a durable and breathable plaster that is suitable for a variety of surfaces. In this section, we will discuss the common uses of lime plastering, including its applications for interior and exterior walls, fireplaces and chimneys, and decorative elements. By the end, you will have a better understanding of the versatility and practicality of this age-old method of construction.
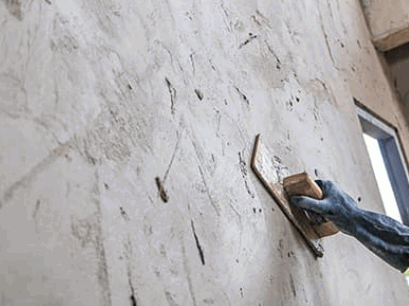
1. Interior and Exterior Walls
Lime plastering is a traditional building technique commonly used for both interior and exterior walls. Here are the steps involved in applying lime plaster to walls:
- Prepare the surface by thoroughly cleaning it and removing any loose or damaged material.
- Mix the lime plaster by combining hydrated lime, sand, and water in the correct proportions.
- Apply the first coat of lime plaster to the wall using a trowel, making sure to cover the entire surface evenly.
- Allow the first coat to dry before applying the second coat, ensuring a smooth and consistent finish.
- Finish and polish the lime plaster by using a trowel or sponge to achieve the desired texture and appearance.
Lime plastering is a popular choice for both interior and exterior walls due to its breathability, flexibility, durability, and aesthetic appeal. It is also considered a sustainable and eco-friendly alternative to cement plastering. Regular maintenance, including cleaning and occasionally reapplying lime wash, can help maintain and extend the lifespan of lime-plastered surfaces.
2. Fireplaces and Chimneys
Fireplaces and chimneys can greatly benefit from the use of lime plaster due to its heat-resistant and breathable properties. Follow these steps to properly apply lime plaster on your fireplaces and chimneys:
- Begin by preparing the surface, making sure to remove any loose or crumbling materials.
- Next, mix the lime plaster according to the manufacturer’s instructions.
- Apply the first coat of lime plaster evenly on the entire surface.
- Allow the first coat to completely dry before moving on to the second coat.
- Apply the second coat, smoothing and shaping it to achieve the desired finish.
- Lastly, finish and polish the lime plaster for a smooth and visually appealing surface.
To maintain the lime plaster on your fireplaces and chimneys, regularly check for any cracks or damage and make repairs as needed. Avoid using harsh cleaning agents that can harm the lime plaster. Instead, use a soft brush or cloth to gently remove any dirt or debris. You can also add fire-resistant accessories, such as a fireplace screen, to protect the lime plaster from excessive heat.

3. Decorative Elements
Lime plastering offers a versatile and attractive option for incorporating decorative elements into various surfaces. To add decorative elements using lime plastering, follow these steps:
- Prepare the surface by thoroughly cleaning it and removing any loose material.
- Mix the lime plaster according to the manufacturer’s instructions, ensuring a smooth and consistent texture.
- Apply the first coat of lime plaster using a trowel or plastering tool.
- Allow the first coat to dry before applying the second coat, ensuring a smooth and level surface.
- Achieve the desired decorative effect by finishing and polishing the lime plaster, such as creating textures or patterns.
Pro-tip: Get creative and experiment with different techniques and tools to create unique decorative elements with lime plastering, such as using stencils or adding colored pigments for added visual interest.
How to Maintain Lime Plastered Surfaces?
Maintaining lime-plastered surfaces is essential for their longevity and appearance. If you want to properly care for your lime-plastered surfaces, here are some steps to follow:
- Regular cleaning: Use a soft brush or vacuum to remove dust and dirt from the surface.
- Avoid harsh chemicals: To prevent damage to the lime plaster, use mild, pH-neutral cleaners.
- Prevent moisture: Promptly repair any leaks or water damage to prevent moisture from seeping into the plaster.
- Protect from impact: To prevent cracks or damage, avoid hitting or scratching the plastered surface.
- Monitor and repair cracks: Regularly inspect the surface for any cracks and use lime putty or plaster to repair them.
By following these steps, you can maintain the beauty and integrity of your lime-plastered surfaces for years to come.


